Showing posts with label Rags. Show all posts

Wednesday, May 21, 2014

What a Week {and it's only Wednesday}

It has been a long time since my last post, but this week has been so eventful that it would be a crime not to write about it!

We started the week like any other - - Sunday was sunny and we had some family fun shopping at Target with money that we don't have.  You know how a tri to Target goes... you go in for chap stick and end up paying $200 at the register for the many things that you never knew you needed!  When we walked in, we headed straight for the carts that can hold three kids.  I'm so glad they have those.  Target is a sanctuary for me.  If I couldn't strap my kids down in my sacred place and push them wherever I waned them to go, I can't imagine where else I would go to get a little peace (and buy a pretty pink handbag at the same time!).  Hubby was with us that day, and of course the Love Bug asked if he could walk.  Are you sitting down, ladies?  My wonderful husband almost let our 2-year-old walk!  Don't worry - - I caught the child before the words were uttered and got him pinned between the plastic seat and the straps.  It was a close one, though!

On Monday hubby's alarm didn't go off, so he had to take the car.  The Peanut cried all morning (no, I'm not exaggerating).  Hubby texted to see how my day was going, and this is the picture I sent him:


Crying and crying and crying and finally fell asleep while I carried him around trying to get some things done!  The little stinker.

When the babysitter got to the house, I caught a ride with a friend in to work.  What a blessing that car ride was!  If you ever need encouragement, just let your husband take your car for the day and ask a friend to pick you up.  I got some much-needed time with her because of a faulty alarm clock, and I am so grateful for that time!  When I got home, I tossed the kids in their cribs for nap time and thought I could get some work done.  Little did I know, I would get a total of 10 minutes to myself that day.  The Love Bug got his leg stuck in his crib.  I wish I had taken pictures, but he was so upset I couldn't really do anything other than cry with him.  He got it caught all the way up above his knee, and he was really jammed in there.  I did my best to get it out myself, but I just couldn't.  Finally, I called 9-1-1 for the second time in my life.  They send 3 firefighters and an ambulance.  It took all three of them to get his leg out of the crib, but to my surprise they didn't have to cut the bars at all!


The next day was a tiny bit worse in terms of baby crying... but we definitely had a better nap time!


It took me forever to get this little man to sleep because he was teething so bad yesterday.  He slept for a little less than an hour, but it was enough time for me to eat my lunch!  I also was able to talk with my accountability partner and dear friend, which was absolutely wonderful!  If you don't have an accountability partner, you need one!

This morning was the icing on the cake that has been my week... and it's only Wednesday!  I hope there aren't sprinkles or fancy lettering in store for us in the next few days...

The boys actually let me sleep until 7:15 this morning!  I jumped out of bed ready to seize the day as any mother of two boys under 3 would - - slowly and groggily.  I decided to get the Love Bug up first {dun dun duuuuun} and then feed the Peanut.  Well, while I was changing a dirty diaper before 8am, my toddler was downstairs chug-alugging the brand new bottle of Infant's Advil!

I'm so grateful for our pediatrician.  She gave me the number for Poison Control (which I wrote down incorrectly and reached "New York's Hottest Talk Line") and reassured me that he would probably be fine because he's... well, a bigger kid.  Once I found the correct number for Poison Control, the nicest lady calmly told me that my oldest baby would have a belly ache and that's probably about it.

What a week!  I'm hoping for some sort of normalcy to rest upon my family within the next few days.

Riches amidst the Rags:
- Wonderful car ride with a friend
- Great first responders who kept me and my Love Bug calm and safe during a state of panic
- Sitting in a Fire Truck (for fun - - not out of necessity!)
- Wonderful chat with another friend
- Infant's Advil to help a teething baby
- Maggie from Poison Control when that Advil was downed by my 2-year-old
- A great pediatrician
- Great friends who have been praying for us this week
- A good night's sleep for all of us last night
- Popcorn and conversation with hubby last night
- Target

Saturday, March 29, 2014

Our Budgeting System

 
Our budgeting system really works for our family.  We learned what we learned from Dave Ramsey's Financial Peace University class.  That was the best investment we have EVER made!  I highly recommend that everyone take this class.


The first step in coming up with a budget is to create a monthly cash flow plan.  You can find a template for this on Dave Ramsey's site.  The idea is that you plan out where every penny of your money goes each month - - it's called a zero-based budget.  When you get to the end of the budget for the month, you should have $0 left over.  That's okay, because you budget in savings.

Figure out what all of your bills for the month total to, using Dave Ramsey's form.  This gives you a great base for your budget.


We use the Allocated Spending Plan each week to move our money around between accounts.  This form was given to us when we took FPU, and it's not available online for free.  What it does is it breaks down all of the items in your monthly cash flow plan, and gives you space to decide when you'll make each payment during the month.  We have it all laid out so that we pay all of our bills on time.

Each week after we get paid, I write out on a separate sheet of paper what money is going in which account.  Then I make our transfers, since all of our paychecks are automatically deposited into the same account.

Hubby's checking is for most of our bills.  Internet, Netflix (which is our replacement for cable), Electric, etc. are automatically withdrawn from his account, so I leave those amounts in his account.

My checking is for any checks that we write.  It's the only account we have a checkbook for.  Out of that account comes tithe, Compassion, student loan payments, and car payments come out of that one.

My savings account is our emergency fund.  His savings is our short-term savings.

Notice the "IOU" in Toiletries - - we borrowed for babysitter, so the next time there is
budgeted money for a babysitter, we will put it in toiletries.


We take out cash for household expenses, which works SO well for us!  It's called the envelope system, and it's wonderful.  Instead of us both using our debit cards to make purchases like groceries, coffee, gas, and other expenses, we have cash set aside for each individual category.  It keeps us on budget.

The categories we budget for in our envelope system are:
Babysitter
Laundry
Gifts
Toiletries
Gas
Groceries
Baby Supplies
Date
Repairs

Happy Budgeting!

Thursday, March 13, 2014

10 Reasons why I love NOT Owning a House


Sometimes it's hard looking into the future and not knowing when we'll be able to buy a house.  So it helps to look at all the things we love about renting, and to enjoy it while we can!  Because once we buy a house, none of these things will ring true - - probably ever again!

#1 - I feel safe
When I hear the neighbors next door, it makes me feel safe knowing that someone is there.  If I screamed, they'd hear.  When I hear a noise in the apartment, I can convince myself that it was the neighbors and not get freaked out.

#2 - It's less work
When something breaks, we don't have to fix it!  One call to maintenance and they're here unplugging the toilet, replacing the window lock, putting new batteries in the smoke detector (yes, I've called them to do this), or even installing our window air conditioner (all things we've actually had them do within the past year)!

#3 - It's less expensive
When something breaks, we don't have to pay for it (unless we broke it because of misuse, of course).

#4 - It's less expensive
We don't pay property taxes.

#5 - Did I mention it's less expensive??
Rent is significantly cheaper than a mortgage - - AND we're not in debt because of a house!  We're not paying interest each month, we're just paying to live here.

#6 - It forces us to simplify
Because we don't have much storage space, we don't have much stuff!  When we don't have room for something in the storage area, we have to get rid of something.  And I love it when that happens - - because it makes us think about how we might be able to bless someone even when we don't have much ourselves!  Baby clothes, furniture, DVDs, and games are all something that other people might be able to use that we just don't have the space for.

#7 - It's easier to clean
Smaller space means less time cleaning!  AND I don't have to worry about cleaning/painting the outside of our home, because that's done for us!

#8 - It's more sociable
When I go to get the mail, I run into my neighbors because we share a mailbox.  When my son plays in the back yard, he makes friends because we share a backyard with our neighbors.  It's much easier to get to know each other than if we had our own house.

#9 - There are rules
I know this may seem like a reason to want a house, and sometimes it is - - but I think that the rules put in place can actually be beneficial for our family.  For example, there's a no smoking in the apartments rule.  Now, we're not smokers - - and we don't plan to be.  But even if we wanted to, we'd have to take it outside.  In the dead of winter?  No thanks!  There's also a no pets rule.  By now we would have adopted a dog.  Trust me - - we don't need a dog right now.  Thank you, rules!

#10 - It will make me appreciate having a house even more when we get there
Right now is not the right time for us to own a house.  And that's okay!  The time we spend renting is preparing us for what's ahead.  I'm glad we are where we are right now, and I'm glad we're headed where we're headed!

Saturday, January 11, 2014

Nursery

I realized I never posted pictures of our Peanut's nursery!  (Or Love Bug's, for that matter...)  So I took a few pictures today.  It's nothing Pinterest-worthy, by any means, but I'm proud of how the rooms look!

Love Bug's nursery first: Winnie the Pooh theme
Picture that Aunt Rachel made for the Love Bug

I bought that clock at Salvation Army for a dollar!

Footprint plate made at Splatter's Studio when
he was a newborn.

Love Bug's favorite corner of the room!

Closet - - where I keep toys that I rotate, some
clothes, books, extra diapers, wipes, and sheets


Rocking chair handed down to Love Bug
 

He had to get in a picture or two :)

Well, the whole alphabet used to be there... on his closet

Charlene made this for me, to put in my classroom.  This
room is the closest thing I have to a classroom these days!

All his animals and blankets in his crib!


And now Peanut's room: Norman Rockwell theme.  We're not quite done yet, but here's what we have so far.


This is the main corner in the room - cradle,
recliner, window :)  Peanut's Papa made that
cradle for Hubby when he was born!

Norman Rockwell pictures of kids

Changing station
And I had to get him in a shot! :)

 
I made this shelf!!  ...With help from Rachel and my dad :)

Dresser that has been handed down through Hubby's family!

Tuesday, October 1, 2013

Community

Community - - I've always thought I knew the meaning of the word.  Until today, when I realized that I had no concept of how to accept the community of others.

I have had an anxiety-filled day.  It shouldn't have been that way, but when you're 30 weeks pregnant and forced to do the one thing that you hate most in the world (yes, that just might be the hormones talking), the simplest of errands can feel like it ends in catastrophe.

On my way out the door to get some routine blood work done this morning, I wrote a Facebook post that many people do when they're feeling the way I felt: I asked for prayer.  When I got into the parking lot of the hospital, I said a prayer myself.  I prayed that God would give me peace, that He would provide me with a technician who really knew what they were doing, and that I would hardly feel the needle that I was fearing so much.

I wiped the tears from my eyes, grabbed my son out of the back seat, and headed in.  When I got to the front desk, the woman looked at me, with my toddler in my arms, and asked if I knew this was a one-hour test.  I told her I hadn't realized.  She then asked me if I had fasted.  No, I hadn't.  I'm pregnant and eat around the clock.  I told her I would figure out another time to come in, and left.

Anxiety spiked.  Now, instead of getting my blood work done in one quick swipe, I would have to sit around the office for an entire hour on an empty stomach.  Not only that, but I would have to figure out how to pay a babysitter for that time.  Financial stress was the last thing I needed.

When I got home I continued to feel Satan attacking me in a way he hasn't in a long time.  I felt everything caving in around me, and I didn't know what to do.  Then the Lord reminded me of the community around me.  The community that was the reason why we moved here in the first place.  He did so through several wonderful people.

Accepting help is not something I do easily.  Tomorrow morning before breakfast I will bring the Love Bug to a friend's house and get the dreaded blood work done without a toddler in toe.  What a blessing it is to have people surrounding me with prayers and love and support, and what an incredible added blessing that several friends have offered to actually help out!  I could not be more thankful.

I promise to make an effort to accept help more often, if you will promise to hold me to it?

Friday, March 29, 2013

Easter Gifts for Childcare Workers


At my church, the nursery is almost always open - - something I am very grateful for, as the mother of a 14-month-old who loves to move around and talk (loudly) during service.

I wanted to give the nursery workers a small gift of appreciation for their dedication to helping young families like ours enjoy the services on Easter.  I have no money, and I am not very crafty.  This is what I came up with (and I'm a little proud of them!).


Cookies in baggies - - cost me no money because I had all the ingredients on hand... and the baggies as well.  I was tempted to run to the store and grab some (off-budget) cuter bags, but I resisted.

 
Those little flowers I have had in my crafting box for a long time now.  Same with the cardstock.
 
What are you doing for the childcare workers at your church this Easter?  Did this post inspire you?  Leave me some love!
 

Monday, March 18, 2013

A Tribute to my new Kindle Fire

I have been wanting a tablet for a long time now - - specifically, I have been wanting an ipad.  Hubby kept telling me that ipads were too expensive (which of course is true) and that another tablet would be just as good (which I couldn't bring myself to believe).

When I was at Best Buy (after carefully planning out our budget and waiting for the right time to buy a tablet), I spoke with a representative and he told me that if I bought an outdated ipad (the only kind of ipad I could afford), in a few years I wouldn't be able to update the software because of how Apple products are.  Apparently they come up with new products and leave their old products in the dust.  Um, no thank you!

So I looked around at all the tablets they had in the store and I decided on the Kindle Fire.  Got an OtterBox for it so the Love Bug can't destroy it and I am so happy!!

What kind of tablet did you buy?  How did you make your decision?  Leave some comment love!

Tuesday, March 12, 2013

Chocolate Cake with Chocolate Frosting


We celebrated my hubby's birthday last night!!  I am so excited that he's turning 25 (and even more excited that I'm not the one turning 25 yet).  I've known my love since freshman year of college when he was 17, we've been best friends since December of that same year, and we've been dating since he was almost 19.  I married him when he was 21 and to celebrate his 25th with him is an extra special gift.  He wanted chocolate cake with chocolate frosting.  Although that's not what I would have chosen, - - when it comes to cake, I'm a vanilla girl - - he gets whatever he wants today!!

Here's the recipe.  I got it from a friend who got it from her mother-in-law.  I don't know where she got it, so if it's yours, let me know and I'll credit you!  It's called Black Magic Cake, and I have to say it's delicious!!  Usually it goes with a peanut butter frosting that is to die for, but hubby wanted chocolate!

Ingredients You'll Need:
1 cup sugar
1 cup flour
3 Tablespoons cocoa
1 teaspoon baking powder
3 Tablespoons oil
1/2 teaspoon salt
1 egg
1 teaspoon vanilla
1 cup boiling water
1 teaspoon baking soda


**Preheat oven to 350°F (I always forget to do this before I start baking...)

Step One: Combine first 8 ingredients

Pour into a bowl the first 8 ingredients above (1 cup sugar through 1 teaspoon vanilla).  No need to mix them yet.

Step Two: Dissolve 1 teaspoon baking soda in 1 cup boiling water

Do just that - - I put the baking soda in the measuring cup and then add the water and stir a bit.  It should dissolve itself for the most part.

Step Three: Mix together all ingredients

Pour the water mixture over the rest of the ingredients in the bowl, then beat the mixture until smooth.  The batter will be very runny!

Step Four: Pour into greased pan and bake

Remember, the batter will be very runny.  That's how it's supposed to be, don't worry!  Grease an 8X8 pan and bake at 350°F for 25 minutes.  I had to put mine in for an extra 3 minutes.  Use a toothpick in the center and if it comes out clean, you're all set!

When it comes out, it should look like this:
 
Step Five: Let cool

Let the cake cool for at least one hour before frosting.  Put it on a wire rack so it really cools all the way through.  If you skip this step or try to rush it, the frosting will run off.

Step Six: Frost
 

Use a knife (or, if you're super-crafty, a pastry squeezy thing) and frost that baby with your favorite frosting.  I used a homemade frosting.

Step Seven: Decorate!
 
I used M&Ms to cover the cake, starting with the sides.
 
 
The top didn't come out exactly like I imagined it, but it still wowed my hubby!  I guess that's what I was going for all along :)
 
Step Eight: Hide it!
 
Tip: a great place to hide things from your hubby: in the oven!

Step Nine: Enjoy!!
I think this was the Love Bug's first taste of cake!  He finished his first (big surprise).
 

Monday, February 18, 2013

Card Table Makeover!


We have a card table that belonged to my late grandmother.  Well, it's pretty old - - and has some scratches in it.  I like having a card table, but I really would like it to look nicer.  I was putsing around on Pinterest and I found this craft idea!  The original idea came from The Bearded Family's blog.  Here's what I did with mine!

What you'll need
  • Card Table
  • Vinyl Tablecloth
  • Staple Gun (and Staples)
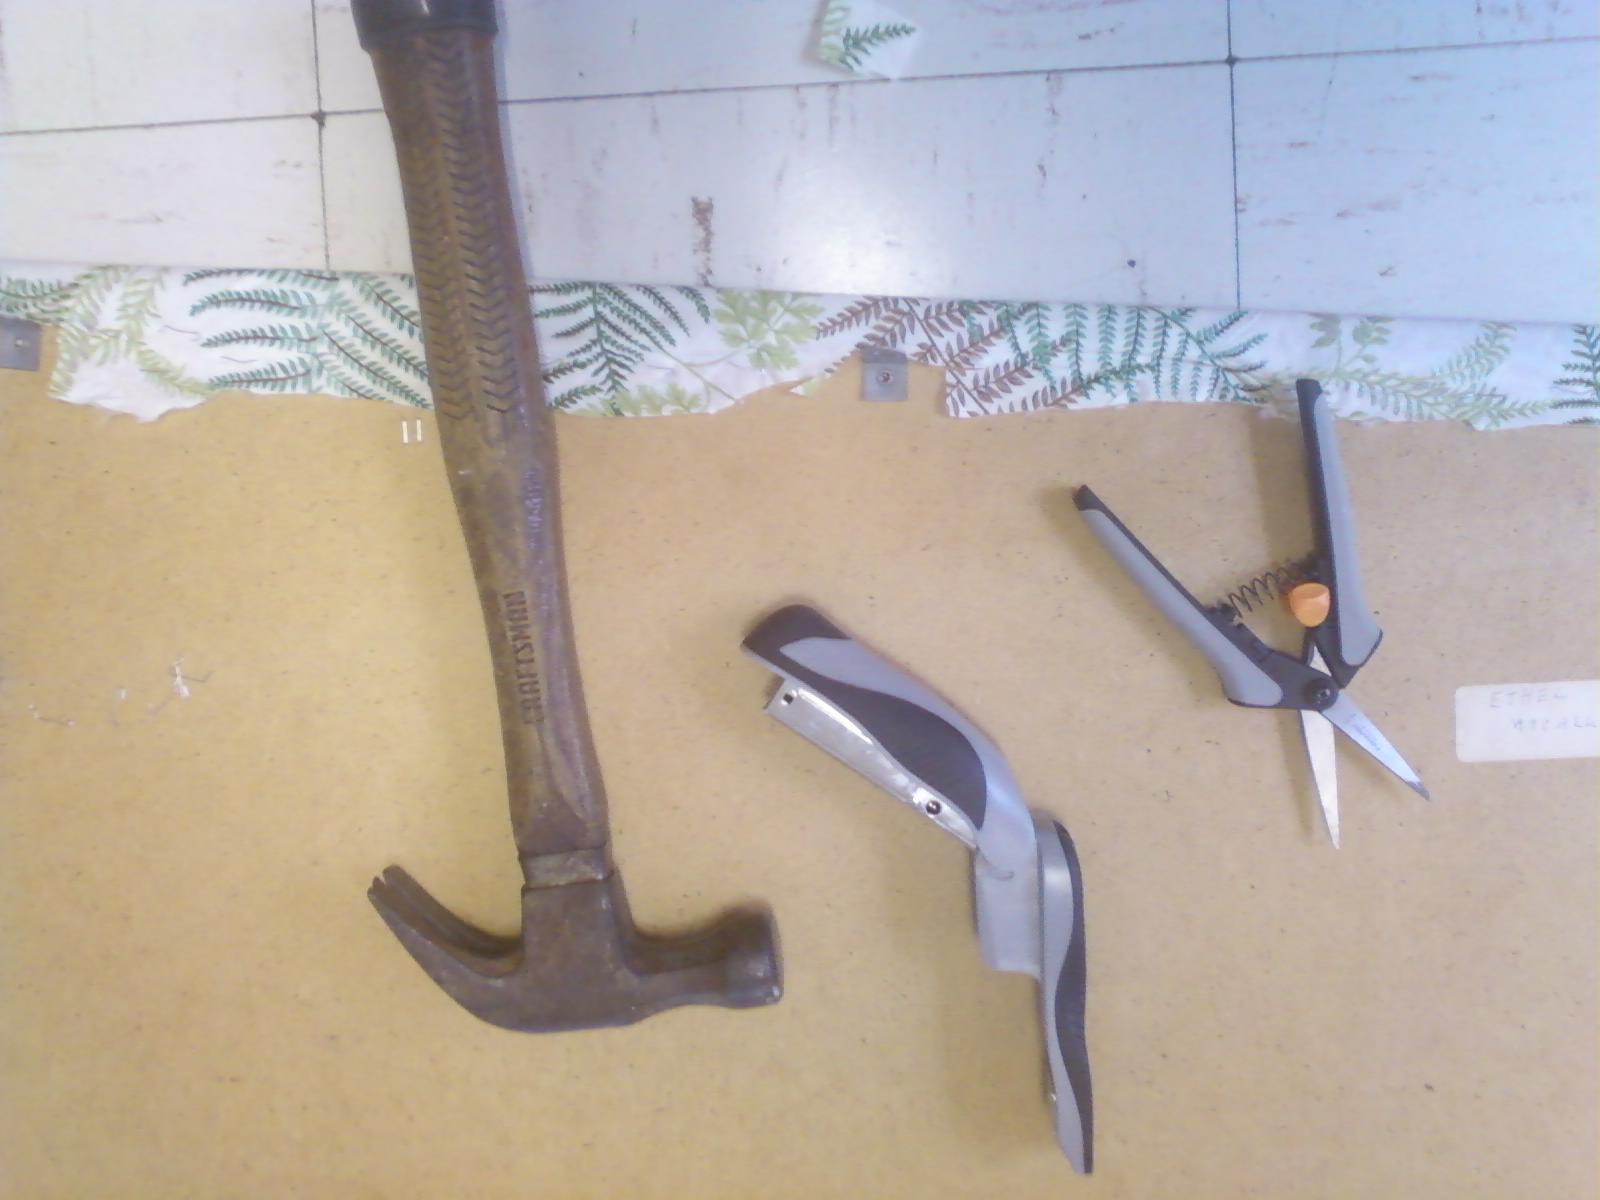
  • Scissors
  • Flathead Screwdriver
  • A big open space (the floor works)
Step One - - Flip the Table
Pull out the legs and flip!  Can you do that?  If so, you can do the rest of this project... trust me, it's super easy!

Step Two - - Take out the screws
Don't let the screws scare you!  They're not difficult to get out with just a regular screwdriver.  Dig through your hubby's tool box and find a flat head screwdriver (looks just like it sounds).  Turn the screw counter-clockwise.  Righty-Tighty, Lefty-Loosey!

Step Three - - Take off the frame
Cool, huh?  Be sure not to lose those screws!

Step Four - - Lay out your tablecloth
I bought my tablecloth for super cheap at Walmart... also check the Christmas Tree Shoppe!
 
Lay the tablecloth on the floor face-down (because you want the design to show when you're done).  Place your table top face-down on top of that.  Make the tablecloth as flat as possible.

Step Five - - Staple while pulling tight

This is the trickiest part of the whole process.  You want to staple the edges of your tablecloth right next to where the original tabletop was stapled.  I used a normal paper stapler, and it was difficult.  Not all the staples held, and I tried hammering them in but that didn't always work either.  I would have used a staple gun, but I couldn't find staples that were short enough to not go through the whole table.

Start at the edge of your table, not at a corner.  Go all the way along the edge with your stapler.


I went from stapling one edge to stapling the adjacent edge (skipping corners - - I saved those for last).  This worked well when it came to pulling the tablecloth tight.  You don't want any wrinkles!!

To do the corners, what you want to do is start at the very edge of the corner and pull the cloth tight with one hand while you staple with the other.


When you have that first staple in, make a cut next to the staple (not too close, and not too far).  This will allow you to pull the middle of your corner straight without creating layers that a normal stapler can't go through.

Next, pull tight and staple again right in the middle of your corner.

 
Then you'll make another cut.
 
Staple the last end of the tablecloth.  Cut off the excess cloth.  Don't cut too close to the staples that you have made.  You might also want to put in some more staples around the corner.

Step Six - - Reattach the frame

If you took it off, you can put it back on!  Screw clockwise this time (righty-tighty).

You're done!  How did it turn out?  Send me a picture, leave a comment!